Googleマップでオリジナルのルート(経路図)を作成できます。
作成した地図は、ウェブサイトに埋め込んで表示することもできます。
ここでは、ルートの作成・保存・共有方法について解説します。
目次
ルートの保存手順
Google マップを開く
Googleアカウントでログイン後、マイマップ( https://mymaps.google.com ) にアクセスします。
ルートを作成
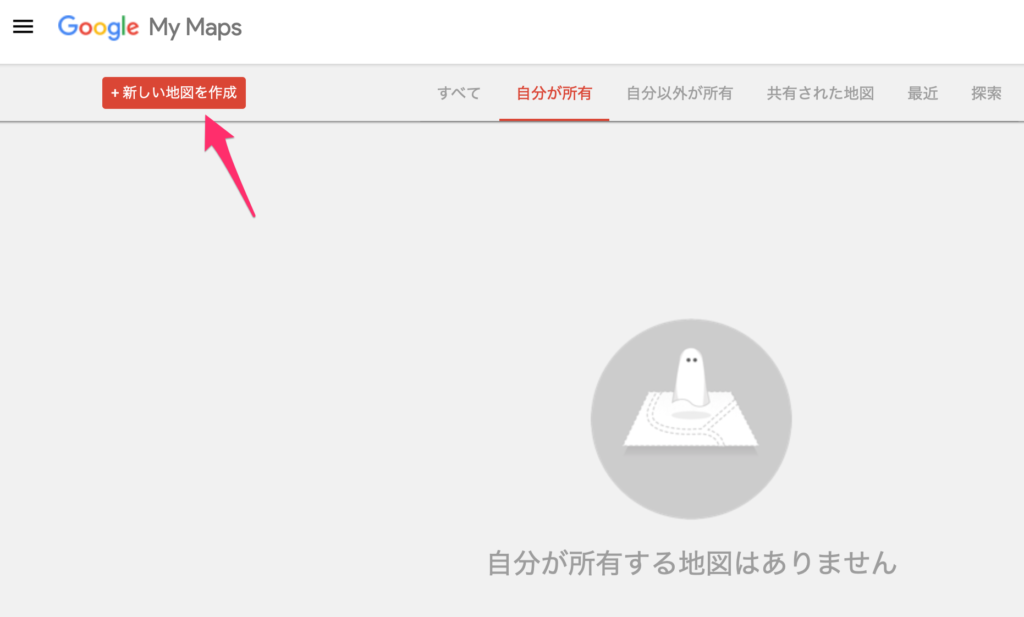
新しい地図を作成をクリックします。
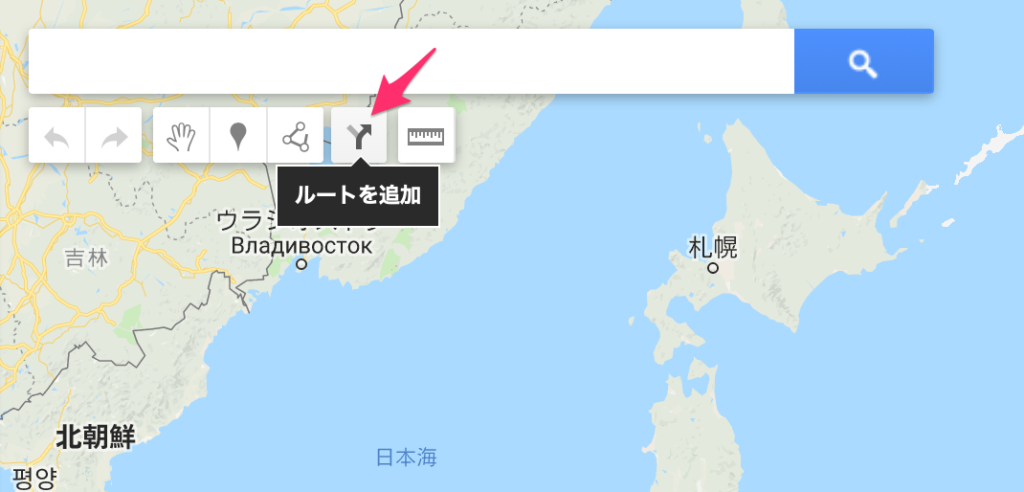
ルートを追加をクリックします。
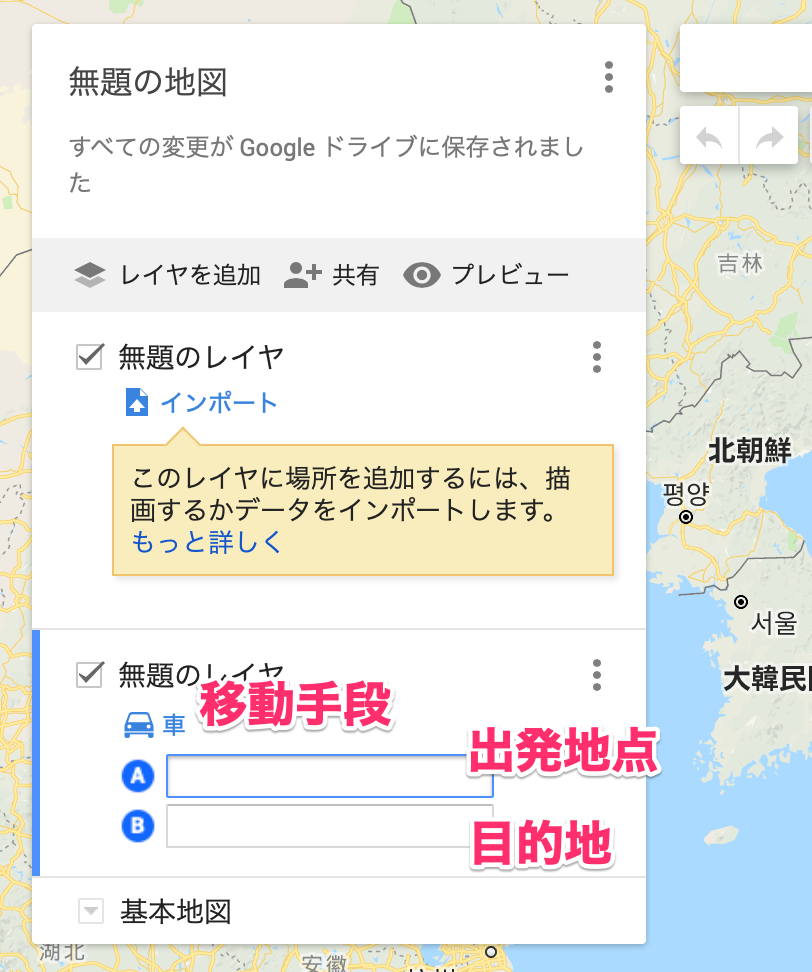
移動手段(車, 自転車, 徒歩) 出発地点 目的地 を設定します。
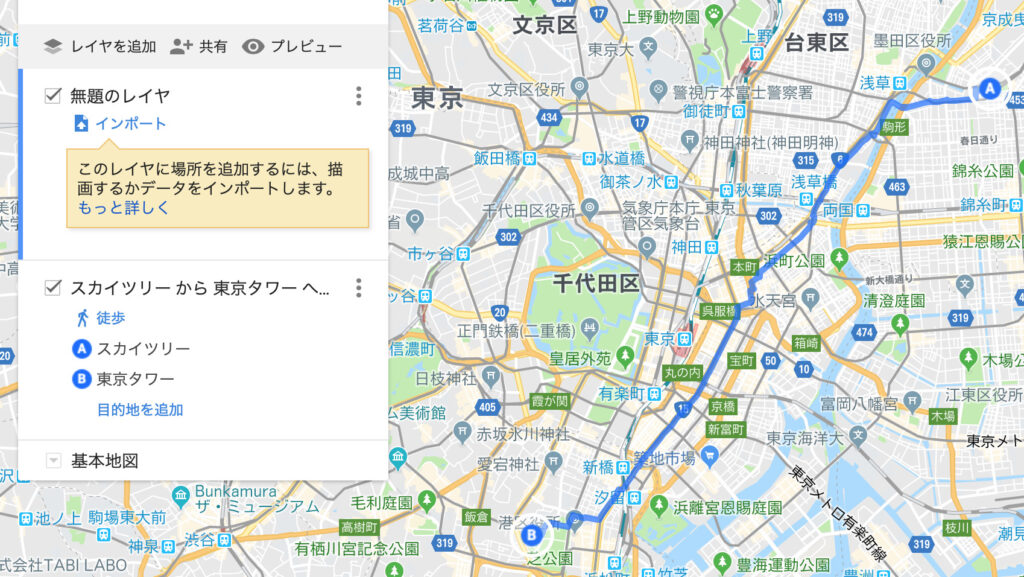
スカイツリーから東京タワーまでのルートが作成されました。
ルートを保存
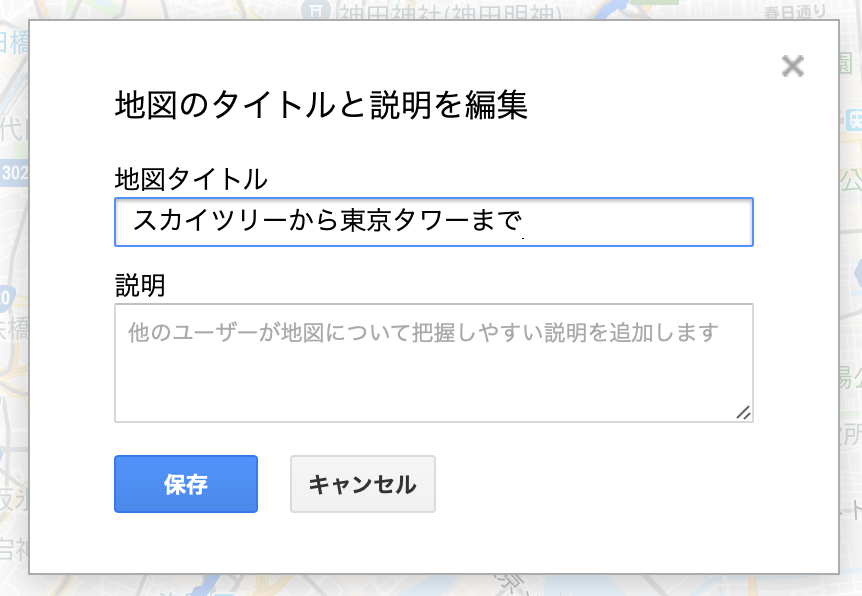
マップのタイトルをつけて保存します。
Googleドライブに保存されます。
ルートの共有方法
現状は非公開
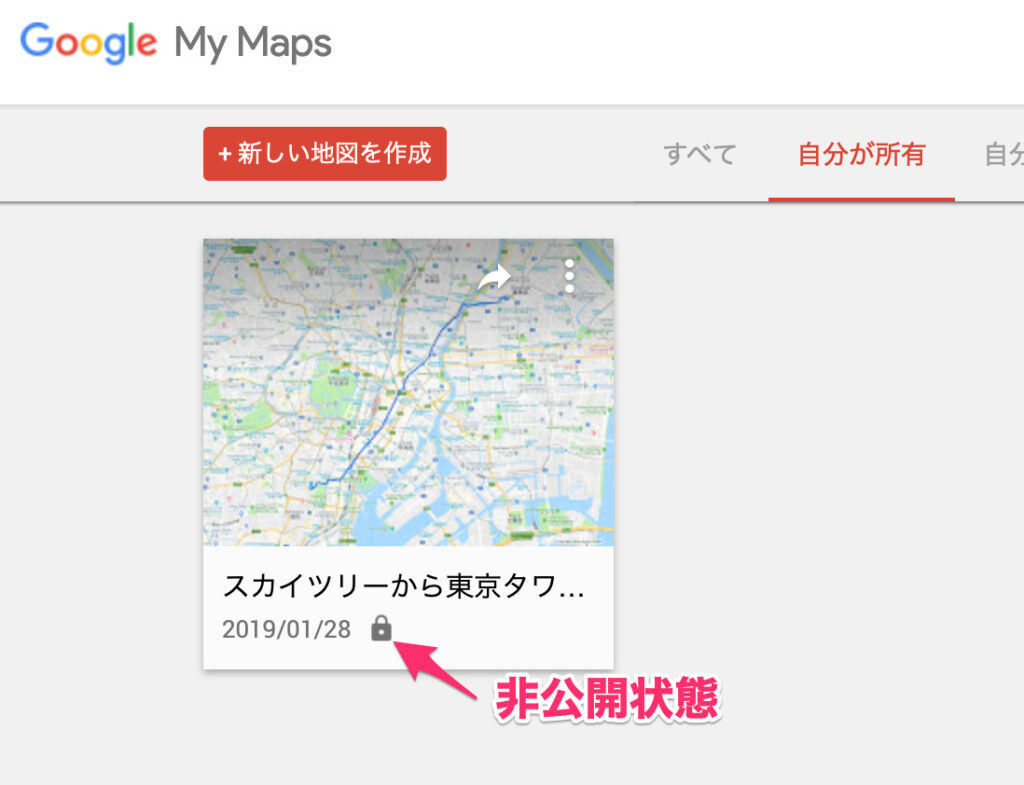
鍵マークがついており、非公開状態です。地図を開きます。
公開設定に変更
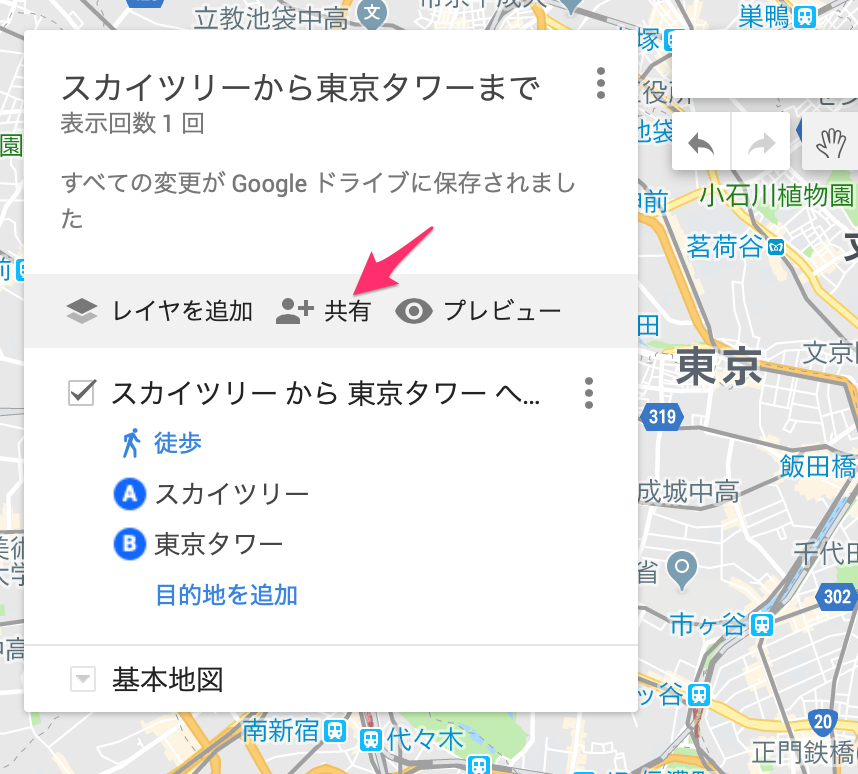
共有をクリックします。
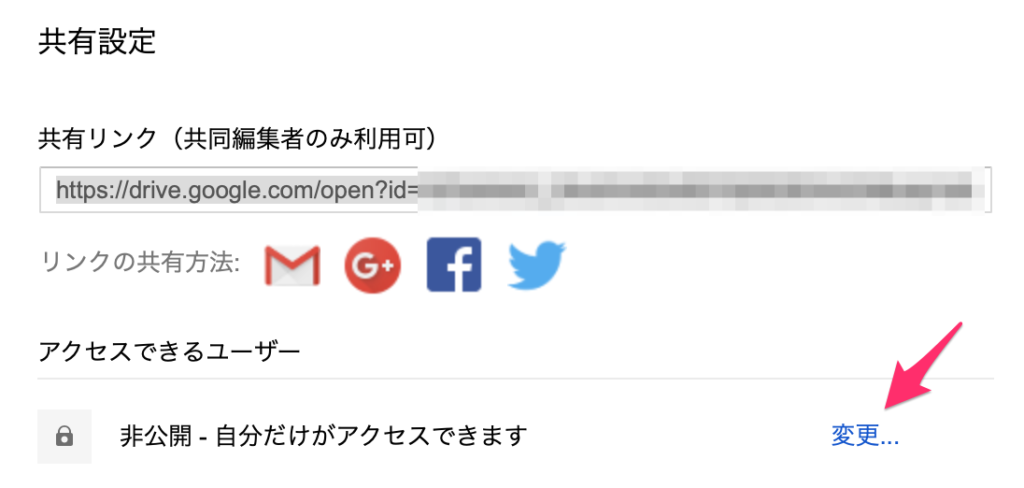
変更をクリックします。
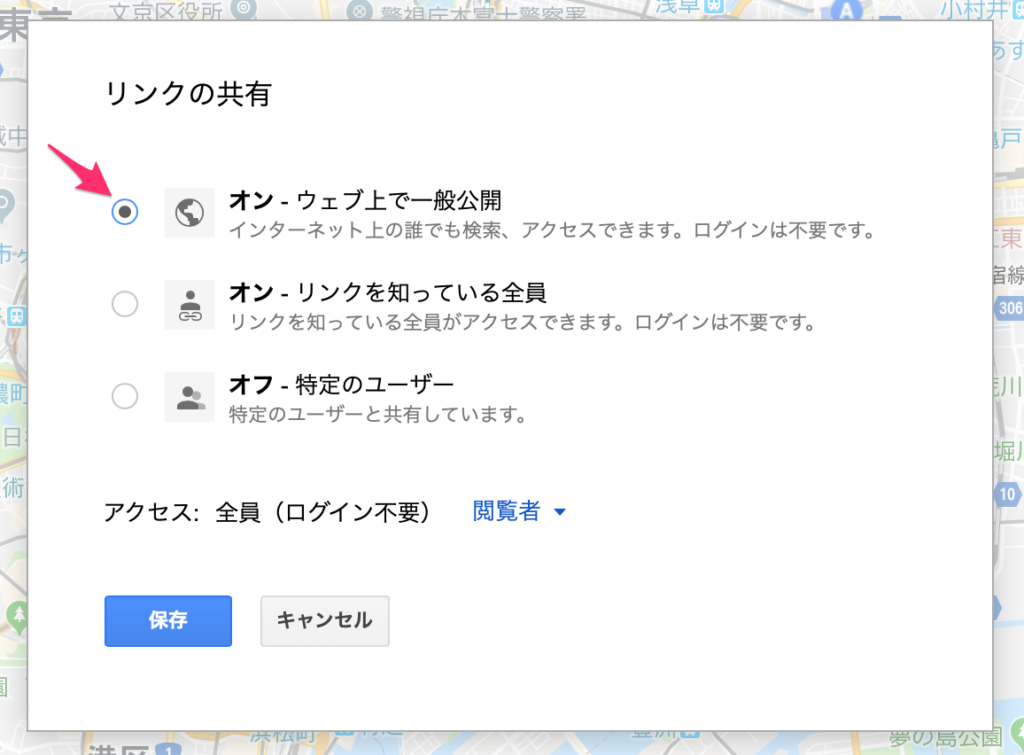
ウェブ上で一般公開を選択して保存します。
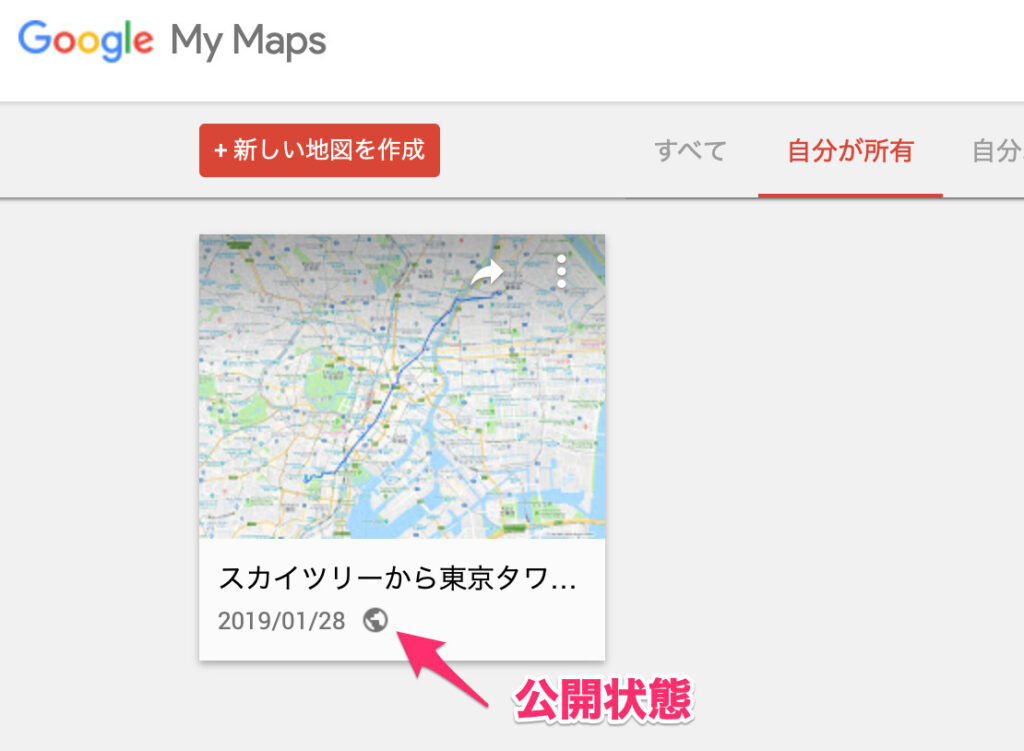
公開状態になりました。
サイトに埋め込む
公開状態にできたのでWeb上に埋め込むこともできます。
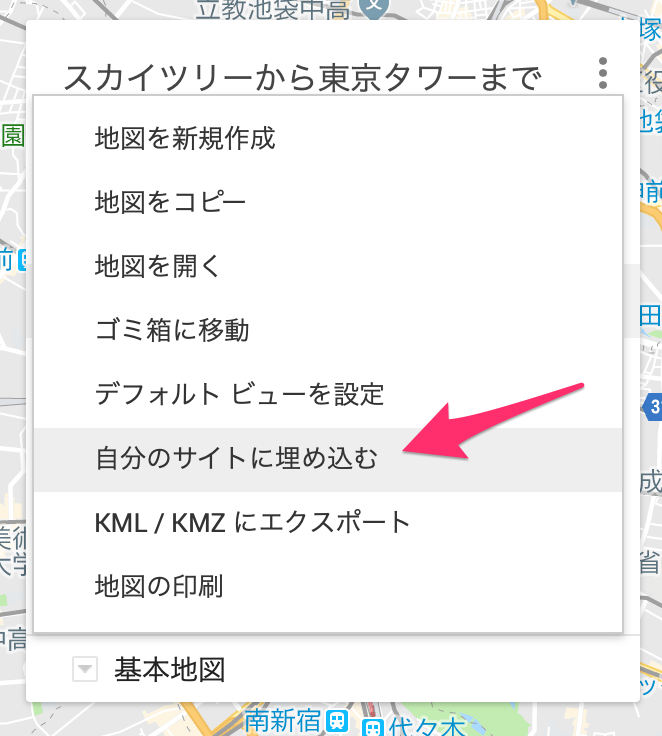
自分のサイトに埋め込むをクリックします。
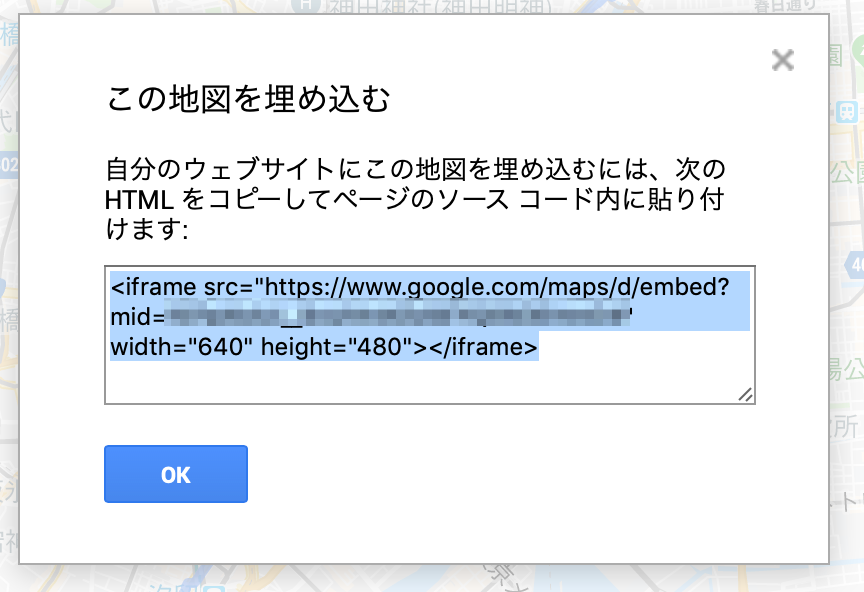
表示されたURLをブログに貼り付けるなどして共有できます。